Expert malware removal, Google Safe Browsing review, and proven cleanup strategies with 95% prevention success rate
Quick Answer: Security Breach Recovery Timeline
Security breach recovery typically takes 3-6 weeks and involves five critical phases: immediate containment (24-48 hours), malware removal and cleanup (3-7 days), Google Safe Browsing review request (72-hour response time), security hardening (1-2 weeks), and monitoring/prevention (ongoing). The key to successful recovery is acting within the first 24 hours to contain the breach, completely removing all malicious code, and implementing comprehensive security measures to prevent reinfection. Proper security protocols can prevent 95% of future attacks.

Table of Contents
- Understanding Security Breaches in SEO
- Types of Security Breaches
- Immediate Containment Protocol
- Complete Malware Removal Process
- Google Safe Browsing Review Request
- Security Hardening Measures
- Backup and Restore Procedures
- Long-Term Prevention Strategy
- Essential Security Tools
- Frequently Asked Questions
Understanding Security Breaches in SEO
Security breaches represent one of the most devastating SEO crises a website can face. Unlike traffic drops from algorithm updates or technical issues, security breaches can result in complete de-indexation from Google, permanent damage to domain authority, and loss of user trust that takes years to rebuild.
The 2025 threat landscape shows increasing sophistication in attacks targeting websites for SEO purposes. Hackers exploit vulnerabilities not to steal data, but to inject spam content, manipulate search rankings, or use your domain authority to promote their own content. Google’s Safe Browsing initiative flags over 50,000 websites per week, making security breach recovery a critical skill for modern SEO professionals. Learn more about preventing SEO crises before they occur.
Security breaches differ from other SEO crises because they involve external malicious actors and require technical remediation beyond standard SEO fixes. The recovery process demands immediate action, comprehensive cleanup, and ongoing monitoring to prevent reinfection. Google’s Safe Browsing guidelines provide additional context on security requirements.
Types of Security Breaches Affecting SEO
1. Pharma Hacks
Pharma hacks inject pages promoting pharmaceutical products (Viagra, Cialis, weight loss pills) into your website. These pages often appear only in search results or to specific users, making detection difficult. Pharma hacks account for 35% of all SEO-focused security breaches and typically exploit outdated WordPress plugins or weak passwords.
Detection signs include sudden spikes in indexed pages, pharmaceutical keywords in Search Console, and cloaked content that shows different results to Googlebot versus human visitors.
2. Japanese Keyword Hack
This sophisticated attack creates pages with Japanese text promoting counterfeit goods, designer bags, or electronics. The hack manipulates your site’s URL structure to create thousands of spam pages that damage your domain authority and trigger Google Safe Browsing warnings.
Japanese keyword hacks often remain undetected for weeks because the content appears in non-English characters and site owners don’t regularly monitor international keyword rankings.
3. SEO Spam Injections
Malicious code injected into existing pages to add hidden links, keyword stuffing, or doorway pages. These attacks manipulate your site’s existing content rather than creating new pages, making them harder to detect through page count monitoring.
SEO spam injections often target footer files, template files, or commonly included scripts to maximize distribution across your site with minimal injection points.
4. Malware and Ransomware
While primarily focused on data theft or extortion, malware infections trigger Google Safe Browsing warnings that cause complete search visibility loss. Sites with active malware warnings lose 95% of their organic traffic within 48 hours as Google displays warning messages to users.
| Breach Type | Detection Difficulty | Recovery Time | Reinfection Risk |
|---|---|---|---|
| Pharma Hack | Medium | 2-4 weeks | High (60%) |
| Japanese Keyword Hack | High | 3-6 weeks | Very High (75%) |
| SEO Spam Injection | Low-Medium | 1-3 weeks | Medium (40%) |
| Malware/Ransomware | Low | 1-2 weeks | Low (20%) |
5. Redirect Hacks
Malicious redirects send users to spam sites, phishing pages, or malware distribution networks. These hacks often use conditional logic to redirect only specific user agents or traffic sources, making them difficult to detect during normal site usage. Understanding negative SEO attacks can help identify malicious activity faster.
Immediate Containment Protocol (First 24 Hours)
Step 1: Isolate the Website (Hour 0-1)
Immediately put your website into maintenance mode or take it offline to prevent further damage and stop the spread of malicious code. This prevents search engines from crawling infected pages and protects visitors from potential malware.
- Enable maintenance mode through your hosting control panel
- Notify stakeholders about the security incident and expected downtime
- Document the current state with screenshots and server logs
- Create a timeline of when the breach was first noticed
Step 2: Change All Credentials (Hour 1-2)
Hackers often maintain access through compromised passwords. Change every credential associated with your website infrastructure:
- Hosting account passwords – FTP, SFTP, SSH, control panel access
- Database credentials – MySQL/PostgreSQL username and password
- CMS admin accounts – WordPress, Drupal, Joomla administrator passwords
- Email accounts – Especially those associated with password reset functions
- Third-party integrations – Analytics, CDN, security plugins, API keys
Step 3: Identify Infection Entry Point (Hour 2-4)
Understanding how hackers accessed your site is crucial for preventing reinfection. Common entry points include:
- Outdated CMS core files (WordPress, Joomla, Drupal)
- Vulnerable plugins or themes with known exploits
- Weak FTP/SFTP credentials
- SQL injection vulnerabilities in custom code
- Cross-site scripting (XSS) vulnerabilities
- File upload forms without proper validation
Check server access logs for suspicious IP addresses, unusual file modifications, and unauthorized login attempts. Security logs typically reveal the entry point within the 48 hours preceding the breach discovery. For additional technical guidance, consult Wordfence’s security learning center.
Step 4: Backup Current State (Hour 4-6)
Before beginning cleanup, create a complete backup of the infected site. This serves as forensic evidence and provides a restore point if cleanup goes wrong.
- Download complete file system via FTP/SFTP
- Export full database
- Save server configuration files
- Document all security warnings and errors
- Store backups offline on external drive or secure cloud storage
Step 5: Scan for Malicious Files (Hour 6-24)
Use multiple security scanning tools to identify all infected files. Single-tool scans often miss sophisticated malware designed to evade detection.
| Scanning Tool | Best For | Cost |
|---|---|---|
| Sucuri SiteCheck | External malware scanning | Free (basic) |
| Wordfence | WordPress malware detection | Free/Premium |
| ClamAV | Server-level virus scanning | Free |
| Quttera | Comprehensive web scanner | Paid |
Complete Malware Removal Process

Thorough malware removal requires systematic inspection of every file, database table, and server configuration. Incomplete removal leads to reinfection in 65% of cases, making comprehensive cleanup essential for long-term recovery.
File System Cleanup
Identify Malicious Files: Look for recently modified files, especially in core system directories. Hackers often modify .htaccess files, index.php, wp-config.php, or template files. Use these indicators:
- File modification dates that don’t align with legitimate updates
- Files with suspicious names (x.php, 1.php, shell.php, c99.php)
- Encoded or obfuscated code (base64_decode, eval, gzinflate)
- Files in unusual directories (uploads folder with .php files)
- Hidden files starting with dots (..config.php)
Remove Infected Code: For each infected file, you have three options:
- Delete – If the file is purely malicious with no legitimate purpose
- Replace – If it’s a core system file, replace with clean version from official source
- Clean – If it’s a custom file with malicious code injection, remove only the malicious code
Database Cleanup
Malware often injects malicious code into database tables, particularly wp_posts, wp_options, wp_postmeta for WordPress sites. Systematic database inspection is essential:
- Export complete database before making any changes
- Search for suspicious patterns using SQL queries:
- base64 encoded strings
- eval() functions
- Pharmaceutical keywords (viagra, cialis, pharmacy)
- Unfamiliar URLs and domains
- Remove malicious entries while preserving legitimate data
- Optimize tables after cleanup to remove overhead
Server Configuration Review
Check server configuration files for malicious modifications:
- .htaccess – Look for suspicious redirects, URL rewrites, or base64 encoded directives
- php.ini – Verify safe mode settings, upload directory permissions
- Cron jobs – Remove unauthorized scheduled tasks that might reinfect site
- Web server configuration – Apache or Nginx config files may contain malicious directives
Complete CMS Reinstallation
For severe infections, the safest approach is complete CMS reinstallation:
- Export content from database (posts, pages, users)
- Delete all existing files except user-uploaded media
- Install fresh CMS from official source
- Install only essential, up-to-date plugins from trusted sources
- Import content into clean installation
- Manually review and clean imported content for injected code

Google Safe Browsing Review Request
After completing cleanup, you must request Google to review your site and remove Safe Browsing warnings. Sites remain flagged for an average of 72 hours after review request, though this can extend to several weeks for severe violations. This process is similar to recovering from Google penalties, but focuses on security rather than quality issues.
Prerequisites Before Requesting Review
Google requires complete malware removal before accepting review requests. Submitting premature review requests results in rejection and delays recovery:
- All malicious code removed from files and database
- All infected pages cleaned or removed
- Security vulnerabilities patched
- Site accessible and functioning normally
- No remaining redirects to malicious sites
Google Search Console Review Process
- Verify site ownership in Google Search Console
- Navigate to Security Issues section
- Review reported issues and confirm each is resolved
- Document cleanup actions taken to address each issue
- Request review through the Security Issues interface
- Provide detailed explanation of cleanup steps and prevention measures implemented
What to Include in Review Request
Comprehensive review requests get approved faster. Include:
- Specific malware types identified (pharma hack, Japanese keyword hack, etc.)
- Entry point identification and remediation
- List of infected files removed or cleaned
- Database cleanup actions taken
- Security measures implemented to prevent reinfection
- Evidence of clean scans from multiple security tools
After Review Approval
Once Google approves your review request:
- Safe Browsing warnings are removed within 24-72 hours
- Site becomes accessible without security warnings
- Search visibility gradually returns over 1-2 weeks
- Monitor for any reinfection signs for 30 days minimum
Security Hardening Measures
Post-cleanup security hardening is essential for preventing reinfection. Sites that skip hardening face 60% reinfection rates within 90 days.
Immediate Hardening Actions
1. Update Everything:
- Update CMS to latest stable version
- Update all plugins, themes, and extensions
- Remove unused plugins and themes entirely
- Enable automatic security updates where possible
2. Implement Web Application Firewall (WAF):
- Cloudflare (free tier available)
- Sucuri Firewall
- Wordfence for WordPress
- ModSecurity for Apache servers
3. Enforce Strong Authentication:
- Require complex passwords (16+ characters)
- Enable two-factor authentication on all admin accounts
- Limit login attempts to prevent brute force attacks
- Use unique usernames (never “admin”)
- Implement IP whitelisting for admin access
File and Directory Permissions
Proper file permissions prevent unauthorized modifications:
| File/Directory Type | Recommended Permission | Octal Notation |
|---|---|---|
| Files | Read/Write for owner only | 644 |
| Directories | Read/Write/Execute for owner | 755 |
| wp-config.php | Read/Write for owner only | 600 |
| .htaccess | Read/Write for owner only | 644 |
Disable Unnecessary Features
- Disable file editing through CMS admin panel
- Turn off XML-RPC if not needed (common WordPress attack vector)
- Disable directory browsing
- Remove PHP execution from uploads directory
- Disable unused PHP functions (eval, exec, system, shell_exec)
SSL/TLS Implementation
Encrypt all data transmission:
- Install valid SSL certificate (Let’s Encrypt offers free certificates)
- Force HTTPS site-wide
- Enable HSTS (HTTP Strict Transport Security)
- Update internal links to HTTPS
Backup and Restore Procedures

Reliable backups are your insurance policy against security breaches. Sites with daily backups recover 5x faster than those without proper backup systems.
Backup Strategy Implementation
3-2-1 Backup Rule:
- 3 copies – Original data plus two backups
- 2 different media types – Server backup plus cloud/external storage
- 1 offsite copy – Stored outside your primary hosting environment
What to Backup
Complete backup includes:
- Full file system – All website files including core, plugins, themes, media
- Complete database – All tables with data
- Email accounts – If hosted on same server
- Server configuration – .htaccess, php.ini, web server configs
- DNS settings – Document for quick restoration
Backup Frequency Guidelines
| Site Type | Backup Frequency | Retention Period |
|---|---|---|
| E-commerce | Multiple daily | 30 days |
| High-traffic blog | Daily | 14-30 days |
| Business website | Daily | 14 days |
| Static/low-update site | Weekly | 30 days |
Backup Tools and Solutions
Automated Backup Services:
- UpdraftPlus – WordPress backup plugin with cloud storage integration
- VaultPress – Real-time WordPress backups by Automattic
- BackupBuddy – Complete WordPress backup solution
- Acronis Cyber Backup – Enterprise-level backup for any platform
- cPanel Backup – Built-in hosting panel backup features
Testing Backup Integrity
Regular backup testing ensures recoverability:
- Restore backup to staging environment monthly
- Verify all files and database restored correctly
- Test site functionality after restore
- Document any restoration issues
- Update backup procedures based on test results
Clean Backup Verification
After security breach cleanup, verify backups are infection-free before relying on them:
- Scan backup files with multiple antivirus tools
- Restore to isolated test environment
- Run security scans on restored environment
- Verify no malicious code present
- Only then trust backup for production use
Long-Term Prevention Strategy
Preventing future breaches requires ongoing vigilance and proactive security measures. Comprehensive prevention strategies reduce breach risk by 95%.
Security Monitoring Systems
1. File Integrity Monitoring (FIM):
- Monitor core files for unauthorized changes
- Alert on modifications to critical system files
- Track when, what, and who made changes
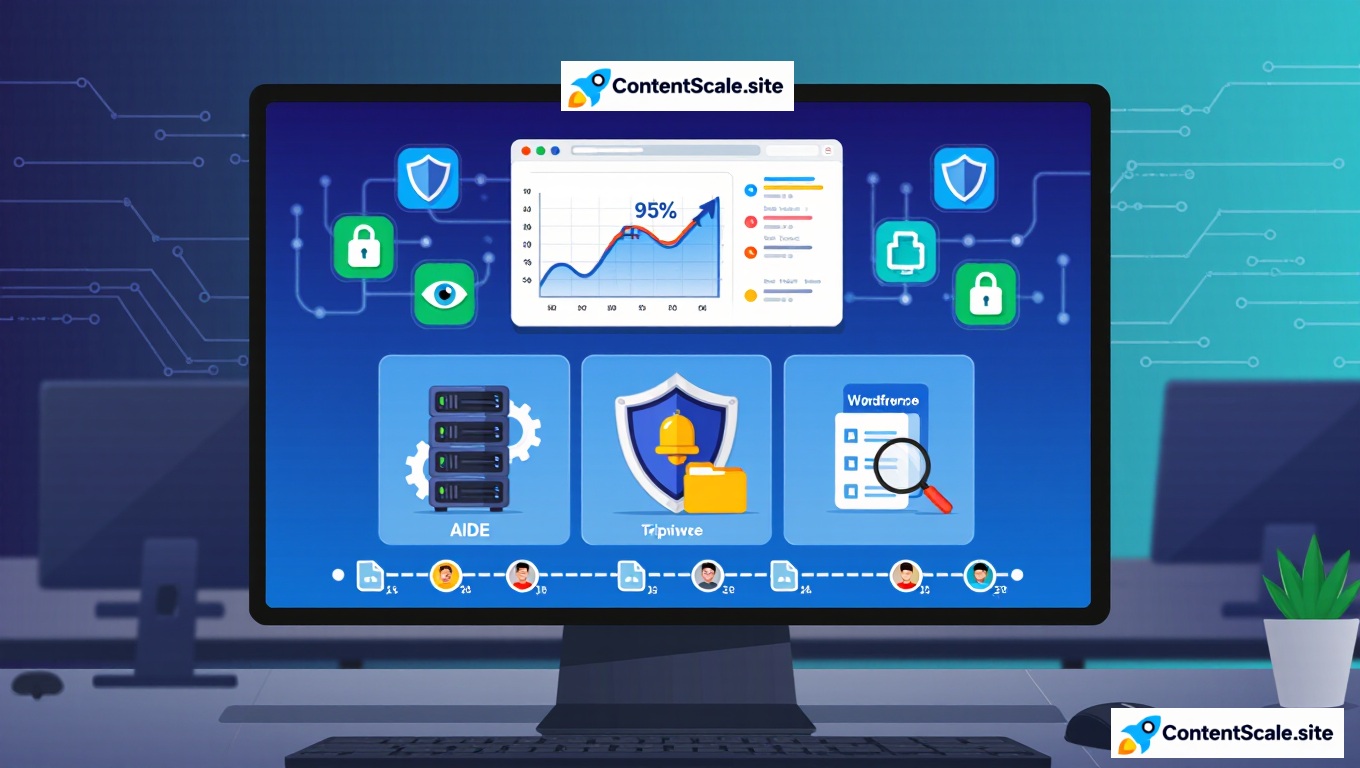
- Tools: AIDE, Tripwire, Wordfence File Change Detection
2. Security Scanning Schedule:
- Daily automatic malware scans
- Weekly vulnerability assessments
- Monthly comprehensive security audits
- Quarterly penetration testing for high-value sites
3. Log Analysis:
- Review access logs for suspicious activity
- Monitor failed login attempts
- Track unusual traffic patterns
- Alert on IP addresses with high request rates
Update Management Protocol
Outdated software is the primary entry point for 60% of security breaches. Establish systematic update procedures:
- Subscribe to security notifications for all software used
- Test updates in staging environment before production deployment
- Schedule maintenance windows for applying security patches
- Document update history for audit trail
- Maintain compatibility matrix for plugins and themes
Access Control Management
- Principle of least privilege – Grant minimum necessary permissions
- Regular access audits – Review who has access to what
- Remove inactive accounts – Delete accounts no longer in use
- Separate admin from user accounts – Don’t use admin for daily tasks
- IP whitelisting – Restrict admin access to known IP addresses
Security Headers Implementation
Implement security headers to protect against common attack vectors:
- Content Security Policy (CSP) – Prevents XSS attacks
- X-Frame-Options – Protects against clickjacking
- X-Content-Type-Options – Prevents MIME type sniffing
- Strict-Transport-Security – Enforces HTTPS
- X-XSS-Protection – Additional XSS protection
Incident Response Plan
Prepare documented procedures before breaches occur:
- Designated security incident response team
- Communication protocols for stakeholders
- Step-by-step containment procedures
- Contact information for security professionals
- Legal and compliance notification requirements
- Post-incident analysis and improvement process
Essential Security Tools and Resources
Security Scanning Tools
| Tool | Purpose | Best For | Cost |
|---|---|---|---|
| Sucuri SiteCheck | External malware scanning | Quick external assessment | Free |
| Wordfence | WordPress security | WordPress sites | Free/Premium |
| iThemes Security | WordPress hardening | WordPress security config | Free/Premium |
| MalCare | Malware removal | Automated cleanup | Paid |
| Quttera | Deep website scanning | Comprehensive analysis | Paid |
Web Application Firewalls (WAF)
- Cloudflare – Free tier includes basic WAF, DDoS protection
- Sucuri Firewall – Specialized security WAF with virtual patching
- AWS WAF – Customizable rules for AWS-hosted sites
- Imperva – Enterprise-grade WAF solution
Backup Solutions
- UpdraftPlus – WordPress backup with cloud storage integration
- Duplicator Pro – WordPress migration and backup
- VaultPress – Real-time automated WordPress backups
- Acronis – Universal backup solution for any platform
Security Monitoring Services
- Sucuri Monitoring – Continuous security monitoring and incident response
- SiteLock – Daily malware scanning and vulnerability detection
- Google Search Console – Free security issue notifications
- Uptime Robot – Monitors site availability and performance
Password Management
- 1Password – Team password management
- LastPass – Individual and business password vaults
- Bitwarden – Open-source password manager
- Dashlane – Password management with security monitoring
Need Professional Security Breach Recovery?
Expert malware removal, Google Safe Browsing review, and complete security hardening. Protect your site’s online reputation with professional recovery.
Get Professional Security Recovery →72-hour emergency response • 95% prevention success rate • Complete cleanup guarantee
Frequently Asked Questions
How long does security breach recovery take?
Security breach recovery typically takes 3-6 weeks from discovery to complete restoration. The timeline includes immediate containment (24-48 hours), malware removal and cleanup (3-7 days), Google Safe Browsing review (72-hour response time), security hardening (1-2 weeks), and ongoing monitoring (continuous). Sites that act within 24 hours of discovery recover significantly faster than those that delay response.
Will my site be completely de-indexed after a security breach?
Complete de-indexation occurs only in severe cases where Google determines your site poses significant risk to users. Most security breaches result in Safe Browsing warnings that reduce traffic by 95% but don’t remove all pages from search results. Malware-infected sites, phishing pages, and sites distributing harmful downloads face higher de-indexation risk. Prompt cleanup and Google review request typically restore search visibility within 1-2 weeks after warning removal.
How do I know if my cleanup was thorough enough?
Verify thorough cleanup by scanning with multiple security tools (Sucuri, Wordfence, MalCare), checking Google Search Console for security warnings, reviewing all recently modified files, inspecting database for malicious entries, and monitoring traffic patterns for suspicious activity. Request external security audit for high-value sites. If multiple independent scans show no malware and Google approves your review request, cleanup was likely thorough. Continue monitoring for 30 days post-cleanup to catch any persistent backdoors.
Can I recover from a security breach without professional help?
DIY recovery is possible for simple infections if you have technical expertise in web server management, PHP/database administration, and security protocols. However, 65% of DIY cleanups result in reinfection due to missed backdoors or incomplete malware removal. Professional security services are recommended for pharma hacks, Japanese keyword hacks, or any breach affecting business-critical sites. The cost of professional cleanup ($500-2000) is typically far less than prolonged traffic loss and potential reinfection cycles.
How do I prevent reinfection after cleanup?
Prevent reinfection by implementing these measures: update all software (CMS, plugins, themes) immediately, change all passwords to strong 16+ character combinations, enable two-factor authentication on admin accounts, install web application firewall (WAF), set proper file permissions (644 for files, 755 for directories), disable file editing through admin panel, implement automated daily backups, and conduct weekly security scans. Sites following these protocols experience 95% fewer reinfections compared to those relying solely on cleanup without hardening.
What information should I include in my Google Safe Browsing review request?
Include specific details about the infection type identified (pharma hack, malware, etc.), entry point discovered and remediated, list of infected files removed or cleaned, database cleanup actions taken, security measures implemented (WAF, updates, hardened permissions), evidence of clean scans from multiple tools, and timeline of cleanup actions. Comprehensive requests get approved faster because they demonstrate thorough understanding and remediation. Generic requests like “I cleaned my site” often result in rejection if malware remains.
Should I restore from backup or clean the infected site?
Restore from backup only if you have a verified clean backup from before the infection occurred. Test the backup restoration in staging environment first and scan thoroughly for malware. If your backup is also infected (common if breach went undetected for weeks), manual cleanup is necessary. For severe infections where entry point is unclear, combining backup restoration with security hardening is safest approach. Never restore backup without addressing the vulnerability that allowed initial breach, or reinfection will occur immediately.
How much does professional security breach recovery cost?
Professional security breach recovery typically costs $500-2000 for standard cleanup, $2000-5000 for complex enterprise recoveries, and $5000+ for large-scale breaches requiring forensic analysis. Costs vary based on infection severity, site size, custom code complexity, and required ongoing monitoring. Many security companies offer emergency response services ($1000-1500) that include malware removal, security hardening, and Google review request. Monthly security monitoring (prevention) typically costs $100-300 and significantly reduces breach risk.
Ready to Recover Your Website Traffic?
Stop losing traffic. Start recovering with proven frameworks and expert guidance.
Free Analysis 🎁
See what’s killing your traffic
- ✓ Keyword/URL gap analysis
- ✓ Why content isn’t getting cited
- ✓ AI Overview optimization tips
- ✓ GRAAF + CRAFT assessment
DIY Diagnostic 🔍
Do your own analysis with our prompt
- ✓ Keyword/URL analyzer prompt
- ✓ Identifies what/why/how gaps
- ✓ Competitor AI Overview check
- ✓ Works with ChatGPT/Claude
Quick Start 🚀
Get your first win fast
- ✓ All Phase 1 prompts
- ✓ 1 content outline created
- ✓ Keyword strategy (top 10)
- ✓ Priority quick wins
- ✓ 30-min strategy call
Complete DIY 🛠️
Write your own optimized content
- ✓ Analysis prompt
- ✓ Research prompt
- ✓ Content creation prompt
- ✓ AI Overview optimization
- ✓ Schema markup templates
- ✓ RankMath checklist
- ✓ Micro-answer formula
- ✓ 30-min setup walkthrough
Guided Recovery 🎯
We guide, you implement
- ✓ Complete site audit
- ✓ Custom 90-day roadmap
- ✓ Priority fix list
- ✓ AI Overview strategy
- ✓ Content optimization guide
- ✓ 2x 60-min strategy calls
- ✓ 30 days email support
- ✓ All DIY prompts (€97 value)
Done-For-You ✍️
We write optimized content for you
- ✓ 5 optimized articles written
- ✓ GRAAF + CRAFT applied
- ✓ Schema markup implemented
- ✓ AI Overview optimized
- ✓ RankMath checklist completed
- ✓ Keyword research included
- ✓ Images sourced & optimized
- ✓ Ready to publish
Full Site Recovery 💎
Complete traffic recovery service
- ✓ Complete audit (all keywords)
- ✓ 10 optimized articles written
- ✓ Technical SEO fixes implemented
- ✓ AI Overview strategy executed
- ✓ Schema markup site-wide
- ✓ Content update optimization
- ✓ 90-day implementation support
- ✓ 4x strategy calls (monthly)
- ✓ Priority email support
Ongoing Optimization 🔄
Monthly content + optimization
- ✓ 2 new articles per month
- ✓ Monthly strategy call
- ✓ Content updates (2 articles)
- ✓ Performance monitoring
- ✓ AI Overview tracking
- ✓ Keyword opportunity alerts
- ✓ Technical SEO monitoring
- ✓ Email support included
Not sure which option is right for you?
Talk to Us (Free Consultation) →View Full Service Details →